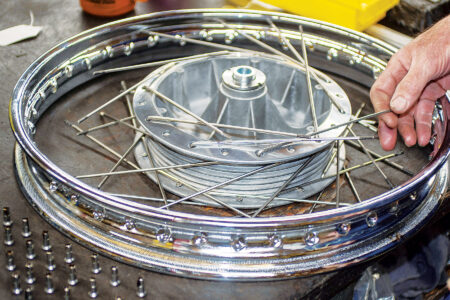
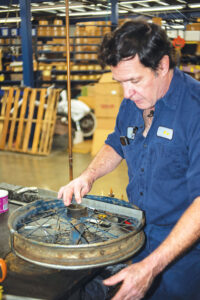
During a recent visit to Buchanan’s Spoke and Rim in Azusa, California, Ken Buchanan walked me through the wheel lacing procedure. There’s more to the procedure and wheel technology than I had imagined.
By way of an introduction, Buchanan’s Spoke and Rim in Azusa, California, has been around since 1958, and for anything related to spokes, rims, or wheel building, they are the “go-to” place. I’ve always been impressed by (in awe of, actually) Kenny Buchanan, his brother Robert, and the Buchanan staff. Buchanan’s can provide replacement spokes for any motorcycle in both stock and increased diameter configurations. They excel in wheel building and rebuilding. Bring a hub, a rim, or a wheel, select a spoke configuration, and Buchanan’s will make it happen. If you are resurrecting a vintage motorcycle and want to bring it back to original specifications, if you are building a custom bike, or if you simply need to replace the spokes (note the plural, which will be explained shortly), Buchanan’s is the place to go. Buchanan’s provides stock and custom spokes, including increased diameter, stainless steel, twisted, diamond, rippled, or bladed configurations. Buchanan’s also makes custom aluminum rims in several different finishes, which they can lace to your stock hub. Everything is manufactured onsite in the company’s Azusa, California, factory. With that as an introduction, let’s get into the “how-to” in lacing a wheel.
One of the first steps in lacing a wheel involves determining if the hub is correct for the wheel. Especially when working with older motorcycles, it’s not unusual for wheels to have hubs that are not original. Another initial step is to determine the offset between the hub and the rim, as hubs, particularly rear wheel hubs, are often offset to the rim to accommodate sprockets, cush drives, and disk brakes. Wheels should be laced such that they follow the motorcycle centerline, and to determine that, it’s best to use the front forks as a reference point. Front wheel rims are usually centered between the forks, but the front wheel hub may or may not be. After determining where the front wheel rim should be, the rear wheel rim’s centerline should be in line with the front, but may not have the rear wheel centered in the swingarm. Before lacing your new spokes and nipples to the hub and rim, make sure you have the correct parts. If you plan to clean, polish, plate, or paint the rim or hub, do so before attempting to lace the wheel.
To preserve the originality of a vintage motorcycle, you may wish to use the original rims, nipples, and spokes, replating or repainting the original components. That’s usually not the case, though, and when relacing a wheel, it’s always best to replace all spokes and nipples. You might be tempted to attempt replacing a single broken spoke, but Buchanan advises against that. I thought I had one broken spoke on a Harley years ago. Ken advised that I probably had two broken spokes (the one I knew about and another one 180 degrees away). I was certain he was wrong, but when I removed the wheel, I learned again that it’s best to listen to an expert. I had two broken spokes, just as Ken had predicted. Spokes and nipples are highly stressed components that experience millions of stress cycles through acceleration, braking, cornering, and simply rolling down the road. These parts are susceptible to fatigue and stress corrosion, as well as other forms of corrosion.
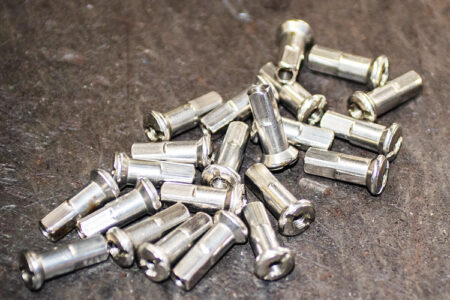
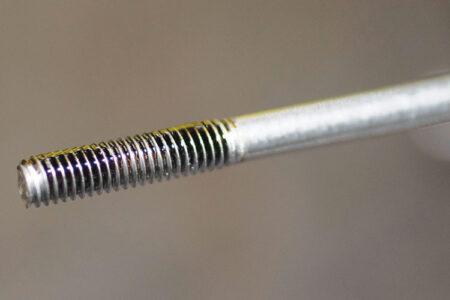
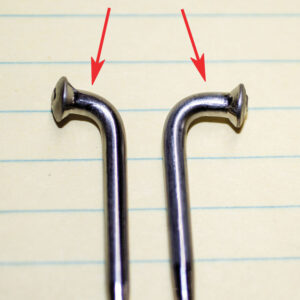
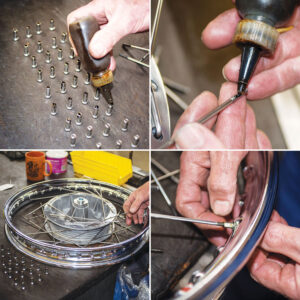
There’s a lot going on with nipples and spokes. Nipples have a slot on their underside for initial screwdriver tightening, flats on their shank for final nipple wrench tightening, and threads on their inside diameter for connecting with the spoke. Spokes on the same wheel are usually not identical. Spokes that mount inside the hub will have different throats than spokes on the outside. Left and right spoke length will be different if the rim is offset from the hub.
Tools required include a workbench, a bolt cutter (for wheel disassembly), a screwdriver, a nipple wrench, a nipple torque wrench, a wheel truing stand, a reference pointer to use with the truing stand, and a thread lubricant. Nipple wrenches, nipple torque wrenches, and truing stands are available from online sources. Regarding lubricants, some wheel builders prefer light machine oils on the spoke and nipple threads, some prefer blue Loctite, and others prefer boiled linseed oil. Linseed oil will lubricate the spoke and nipple threads and then dry, providing a locking feature while not attracting grit in use. Buchanan uses extrusion oil for the nipple-to-spoke interface and lubricating oil on the nipple-to-rim interface.
Seven steps are involved in lacing a wheel. These include photographing the old rim and hub and measuring the hub offset with respect to the rim prior to disassembly. Next is wheel disassembly, initial hub and spoke assembly, initial nipple installation, spoke tightening, and wheel truing. The last step is iterative until the wheel is true. Ken and his techs can accomplish the above in 40 minutes or less; you and I might require two or three hours.
1 Pre-Disassembly Photography
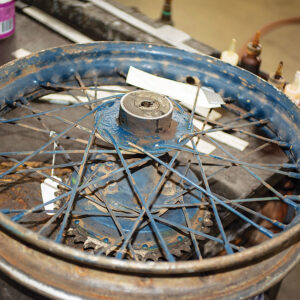
Take several photos of the wheel and its spoke arrangement prior to disassembly, and in particular, the spoke crossover pattern and where spokes go on the inside of the hub lip and the outside the hub lip. Photograph everything; the photos will be invaluable during assembly.

2 Measuring Hub Offset
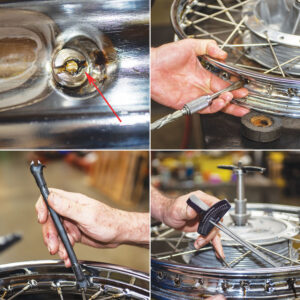
Measure the lateral offset of the wheel rim edge to a reference point on the hub. This is accomplished by establishing a hub reference point (usually the flat surface near where the axle goes through the hub), placing a horizontal straightedge along the hub from that reference point to a point beyond the rim’s edge, and then vertically measuring (and recording) the distance from the straightedge to the rim’s edge. A dimensioned sketch will be helpful during assembly.
3 Wheel Disassembly
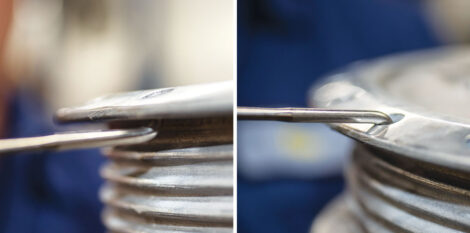
Disassembly involves cutting the old spokes with a bolt cutter, removing the spokes from the hub, and then removing the other half of the cut spokes and nipples from the rim. As the wheel is being disassembled, photograph the inside and outside spokes and their throat lengths. The spokes that go on the outside of the hub flange will have longer throats; those that go on the inside of the hub flange will have shorter throats.
4 Initial Spoke Installation
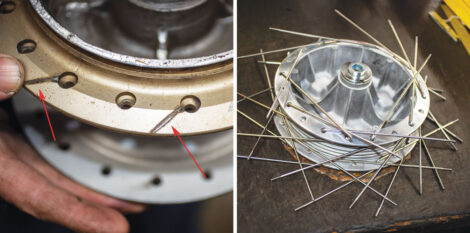
With the hub flat on the workbench, insert the spokes on the outside and the inside of the hub from the top, and then do the same from the bottom. Make sure the inside and outside spokes are installed correctly, taking note of the throat lengths to prevent mixing the two. The photographs taken prior to and during disassembly will be useful here. The way the spoke will face when connected to the rim will be apparent from the spoke wear pattern on the hub. You can see which way the spokes should be oriented as you assemble the wheel. After inserting all the spokes, rotate them toward the hub in the direction they will take when the wheel is complete. This will allow placing the rim on the workbench without it contacting the spokes.
5 Initial Nipple Installation
Lay out all the nipples in groups of four. Almost all wheels will have multiples of four for spoke count. Lubricate the nipple threads.
Noting the rim’s orientation (dimples and drill pattern) lay the rim over the hub and spokes. Rotate each spoke, starting with the outer spokes on top, to the position it will have in the assembled wheel.
Lubricate each spoke’s threads. Lubricate the outside of the nipple head, and then install each nipple into the rim and start to thread the nipple onto its mating spoke by hand with only a few turns. Continue until all spokes and nipples are initially connected. Don’t attempt to fully thread the nipples onto the spokes yet; that will occur in a subsequent step.
6 Spoke Tightening
Using a screwdriver, tighten the nipples from the nipple undersides, i.e., from inside the rim. While doing this, the objective is to keep the hub approximately centered in the rim. Don’t fret attaining perfection at this point; that will occur in the next step when truing the wheel.
After the nipples have been tightened with the screwdriver, tighten them with the nipple wrench and then the nipple torque wrench, tightening each set of four spokes on the left side of the wheel and then the right side of the wheel, and then moving to opposite set of spokes 180 degrees away on the other side of the wheel. Continue in this manner until all spokes are torqued. Typically, spokes will have different torques on the left and right sides of the wheel unless the rim is to be centered to the hub. If not, as is usually the case on rear wheels, the torque values are 30 in-lbs on one side, and 45 in-lbs on the other side (for an uncentered rim). For a rim that is centered to the hub, the nipple torques will be approximately equal. Some motorcycles will require higher torque values; e.g., Harleys, motocrossers, and dual sport torques are typically 80 in-lbs.
After all the nipples have been initially torqued, check rim offset by measuring where the rim edge is laterally with respect to the hub reference point. Using the nipple wrench, tighten the spokes to move the rim in the desired direction. If the rim needs to move to the left (with respect to the hub), tighten the spokes on the left side of the hub. If the rim needs to move to the right, tighten the spokes on the right side of the hub.
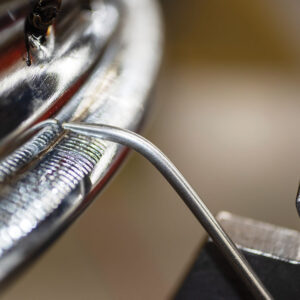
7 Wheel Truing
Once the above steps are completed, the wheel must be trued. What we are seeking to achieve is maintaining required rim/hub offset, and truing the wheel to not more than ±0.015 inch lateral runout (side-to-side variability around the rim circumference) and not more than ±0.015 inch diametral runout (variability in wheel diameter and wheel concentricity to the hub). Diametral variability, when met, assures the wheel is round (there are no high or low spots, or bulges), and that the rim is concentric to the hub. To achieve this, we’ll use a runout indicator positioned near the rim’s edge. We spin the wheel, compare its variability to the runout indicator, and selectively tighten spokes to true the rim. A business card is about 0.015 inch thick, so ±0.015 means the wheel’s left-to-right and concentricity variability will be less than the thickness of two business cards.
You can review all of Buchanan Spoke & Rim’s offerings online.


