
It’s the simple things, really: Just fuel, air and spark. Of course, if we want to be more specific, clean fuel, clean air and the correct spark (at the correct time) is even more important. If you’re like us, you’d prefer to spend the first nice weekend this spring out riding instead of being stuck in the garage wrenching, so give your bike a good once-over now and it will be ready to go when the weather warms again.
The well-preserved classic bike we are working on here is a 1973 Yamaha TX650. With just more than 10,000 original miles, it’s survived the last 30-something years without too much abuse, but hasn’t seen much in the way of general maintenance, either. The prior owner attempted a variety of fixes, and while some were done well, some weren’t. This time, we’ll get things right.
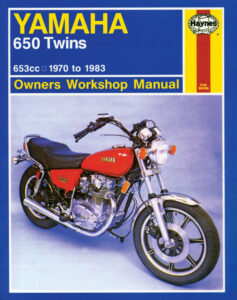
To begin, we picked up a Haynes manual (Haynes.com, $44.95) specifically for the Yamaha 650 twins. No matter how well you know your bike or how well you think you know what you’re doing, a good manual is worth its weight in gold. Look at it this way: If nothing else, it’s cheap insurance in case you forget how something came apart.
Different bikes require different maintenance, but for this tune-up, we’re going to begin with the basics. First we’ll check the condition of the air filter and clean or replace it if needed. Next, we’ll move on to the spark plugs, which should be replaced once a year or so on our bike whether they look like they need it or not. We’ll then show you how to replace the ignition points and condenser, set the timing, and also how to adjust the tension on the timing chain.
Other things you might consider doing to your bike in preparation for riding season include changing the oil and filter, lubing and adjusting your control cables, checking to make sure that all of your lights work, topping off your battery with distilled water, and hooking up a battery maintainer until riding season comes. Also, a good overall cleaning and a check for any loose nuts and bolts is a good idea.
The easiest part of a tune-up is making sure you have a clean air filter (or multiple filters, in this case). Many bikes have paper element filters. These can be upgraded to a foam element filter, which will be more expensive to buy, but can be cleaned, oiled and reused many times. We’ll start our tune-up by looking at the air filters.
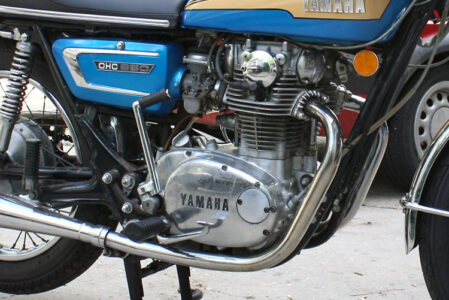
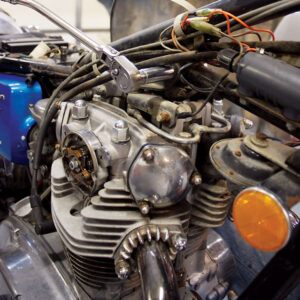
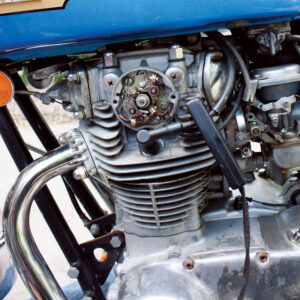
1. Here’s our subject bike, a 1973 Yamaha TX650. Note the right side cover, just behind the carburetor. Remove this by loosening the bolt holding it in place.
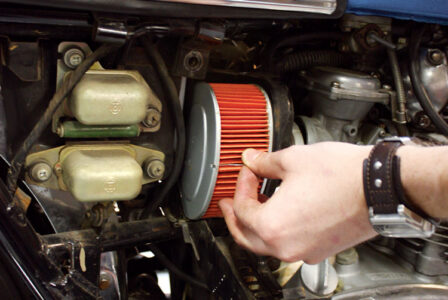
2. Behind the sidecover lies the airbox. Simply flip down the airbox lid and remove the air filter element. If it’s dusty or dirty, use compressed air and carefully blow it from the inside out. If it appears greasy, oily, or if it’s coming apart, it’s time to replace the filter.
3. Starting on the right side, grab the spark plug wire boot at the base and pull it off. Use a spark plug wrench to remove the plug.
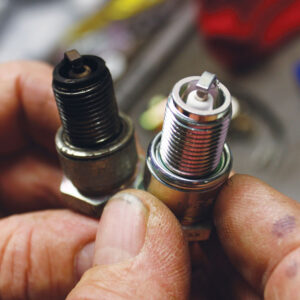
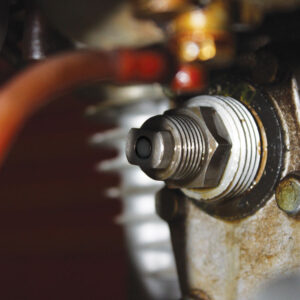
4. You can see the difference between the old dirty plug and a fresh, clean one. This plug should have been replaced long ago.
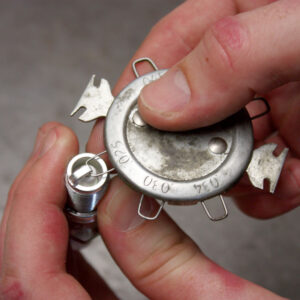
5. Using a spark plug feeler gauge, check to see if the plug is gapped correctly. For our 650, the gap should be 0.6-0.7mm, or roughly 0.025in.
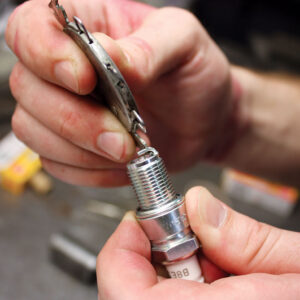
6. If the gap is not correct, use the notch on the spark plug gapping tool to adjust the gap between the center and side electrodes. Put a little anti-seize compound on the threads of the plug before you re-install it. Don’t over-tighten the plug. Just snug is good enough. Repeat the process on the other cylinder.
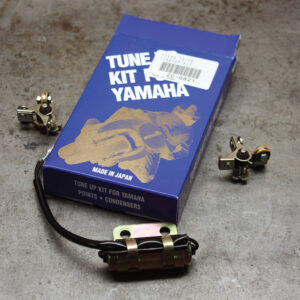
7. Next we will replace the condensers. The condensers (bottom) and two sets of points (left and right) came in the tune up kit we got from Z1 Enterprises.
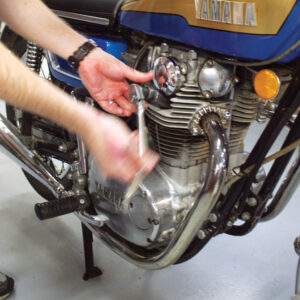
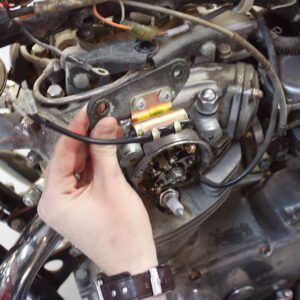
8. Remove the gas tank. On our 650, the condenser pack is attached to the top engine mount. Standing on the right side of the bike, remove the two nuts that hold the engine mount to the frame. You can see our socket wrench on the forward nut.
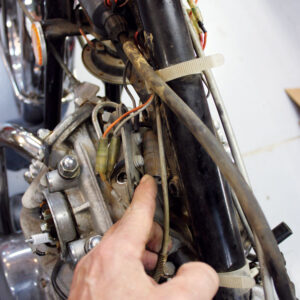
9. Move to the left side of the bike and remove both bolts that you just took the nuts off of. Then remove the vertical bolt that holds the top half of the engine mount to the bottom half. This will allow you to remove the mount. The condenser pack is located on the back of the mount.
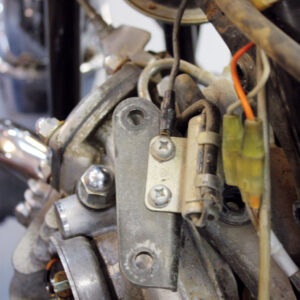
10. Use a Phillips screwdriver to remove the two screws that hold the condenser pack to the mount. Note the ground wire attached to one of the screws.
11. There are two black wires that run from the condensers into the wiring harness. Carefully pull at the end of the wires to unplug them from the connectors in the wiring harness.
12. Attach the new condenser pack to the mount. Replace and torque all three bolts and their nuts to attach the mount back to the frame, the condenser wires into the harness. Don’t forget the ground wire, which we did in this shot!

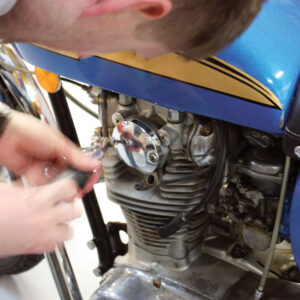
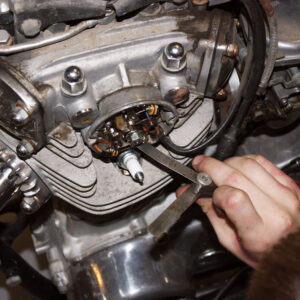
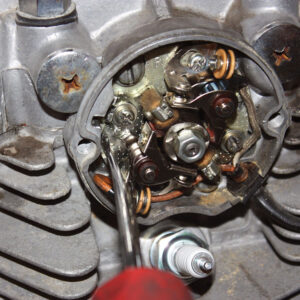
13. Next we will install new points. First, remove the two screws that hold on the advance cover on the right side of the bike, just above the cylinder head, so you can check the advance mechanism for free movement. Make sure both weights move freely and the springs aren’t binding. Apply a small dab of oil to each pivot.
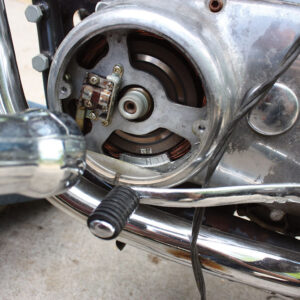
14. Once you’ve confirmed the advance unit is moving freely, go around to the left side. Remove the points cover.
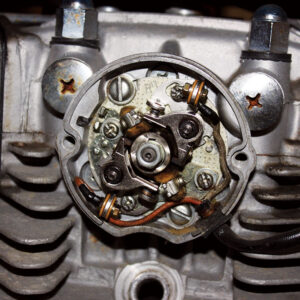
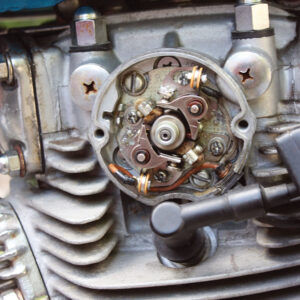
15. The points are held in place by a single screw each, just next to where the electrical connections are. The other screws are for timing.
16. Remove the single screw holding each set of points to the points plate. Don’t loosen any of the other screws at this juncture.
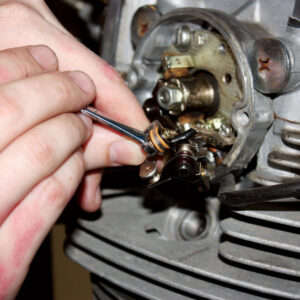
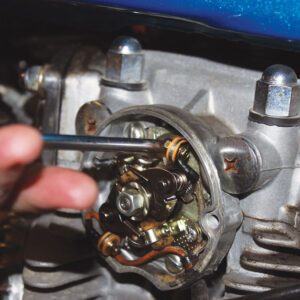
17. Use an 8mm wrench and a screwdriver to remove the nut that holds the electrical wire to the points and remove the points.
![]()
18. You can see the transfer of metal that’s just beginning to occur from one contact to the other on our old points. These aren’t really bad, but we’ll replace them anyway. Reattach the electrical leads and then secure the points to the timing plate with both screws.
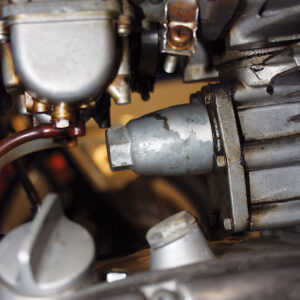
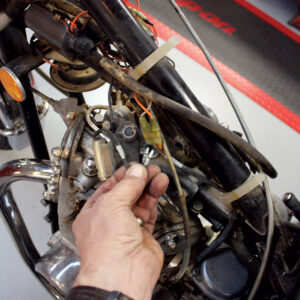
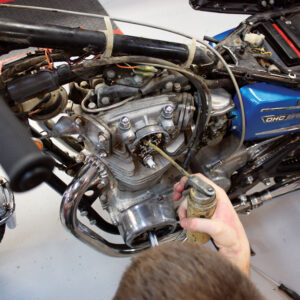
19. Before you time the engine you should adjust the timing chain. First, remove the adjuster cover, visible on the back side of the engine just below the carburetors. Rotate the crankshaft forward 1/2 turn or so to get slack on the chain.
20. With the cover off, loosen the locking nut visible here and turn the stud until the adjuster pin, just visible inside the stud, is flush with the flat on the stud, as shown. Rotate the engine; the pin should move in and out by equal amounts. Replace the adjuster cover.
21. Slowly rotate the engine until the camshaft lobe contacts the rubbing block on each set of points, and using the adjusting notch in the points, set the gap on the new points to 0.3 to 0.4mm (0.015-0.016in).
22. Apply a couple of drops of oil to the two felt pads that wipe the camshaft lobe.
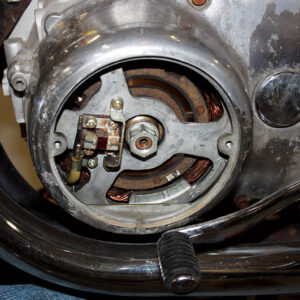
23. Remove the cover on the bottom left side of the engine just in front of the shifter. Inside you’ll find “F” and “T” markings at the 5 o’clock position. Rotate the engine until the scribed mark on the crankshaft comes into view. That’s your crank timing mark; “T” is top-dead-center, “F” is timing at idle.
24. Attach the timing light to the right plug wire and check the right cylinder timing with the engine at a 1,000-1,200rpm idle. If it’s correct, the mark scribed on the crankshaft will line up with the “F” on the engine cover, as shown above.
25. If the timing’s not correct, loosen the two slotted screws on the points base plate at 11 and 5 o’clock and slowly rotate the plate left or right until the proper timing is attained for the right-hand cylinder.
26. Next, attach the timing lead to the left plug wire and with the engine at idle check the timing for that cylinder. Like the right cylinder, the scribe on the crankshaft should line up with the “F” on the engine cover.
27. If it doesn’t, loosen the Phillips screws at 10 and 4 o’clock securing the half plate for the left points. Slowly rotate the plate left or right until proper timing is attained for the left cylinder. That’s it, your engine’s tuned and timed!


